Anamorphic

Red Helios.

April 24, 2016

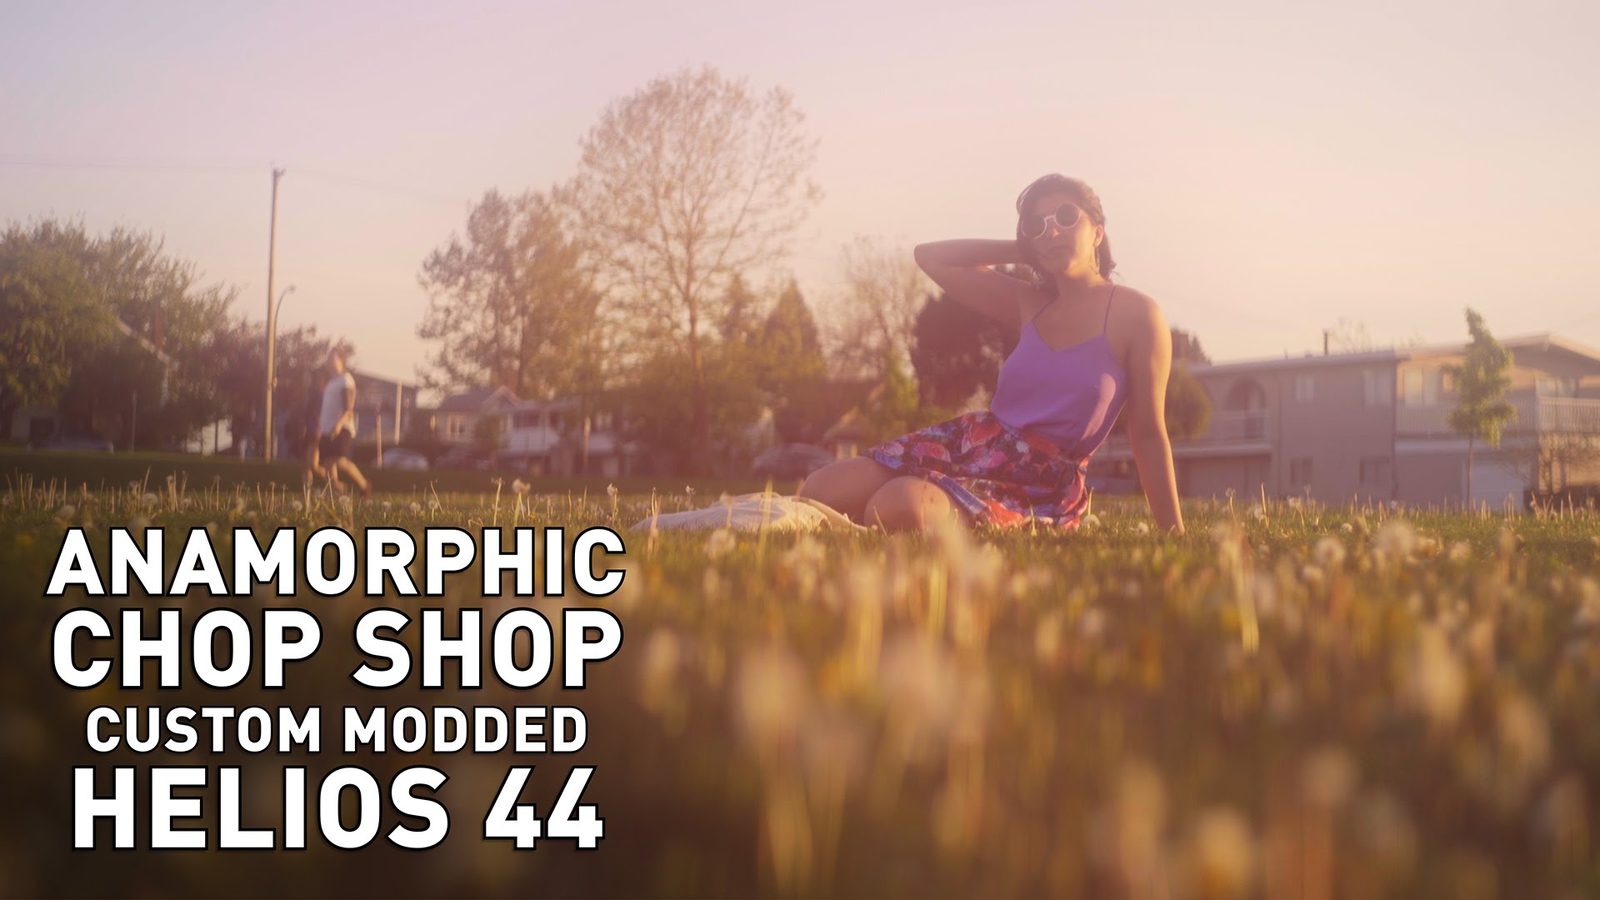
A few weeks ago I was inspired by a facebook post to experiment heavily modding one of my Helios 44-2 lenses. The entire process took me less than an afternoon and I think the results are pretty unique. I'm working on a tutorial for it, and depending on the price of the Helios, the total won't get even to $50, including all the materials. This is a cheap way to get a unique (and extreme) look to the footage coming straight from camera.

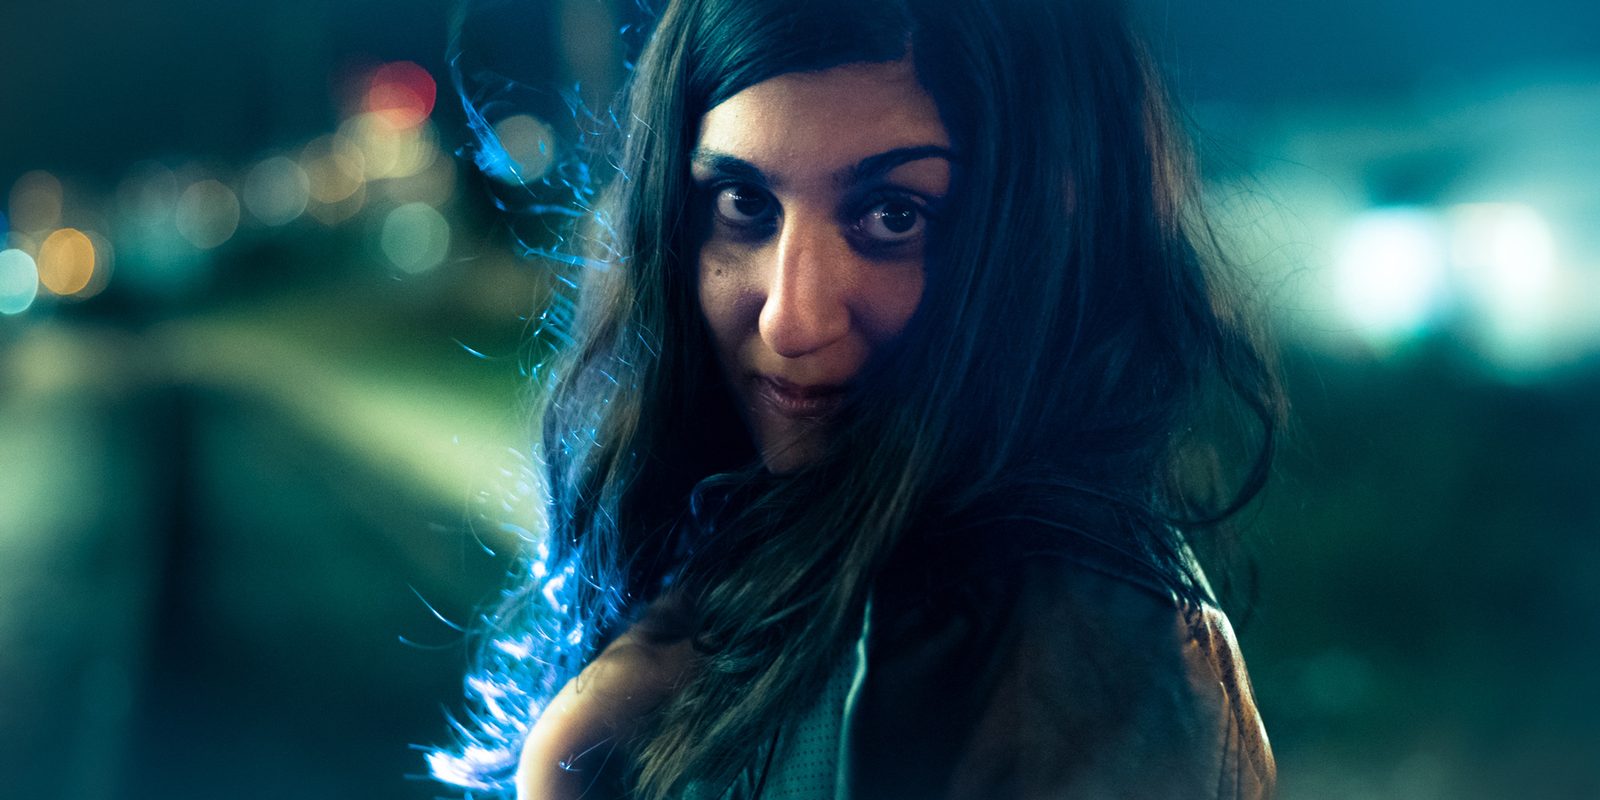
Shooting with this lens is addictive because I never fully know how it's gonna behave, and everything looks surreal and dreamy. I'm working on a second one, purple this time.

Day-to-Day Anamorphic

Anamorphic on a Budget - The New Romantics

April 18, 2016

Double post? Not really, since the previous one didn't cover any of the technical aspects of the shooting and I'm pretty sure - based on my A7s2 post - that there are many people interested. First of all, VOTE FOR US HERE!


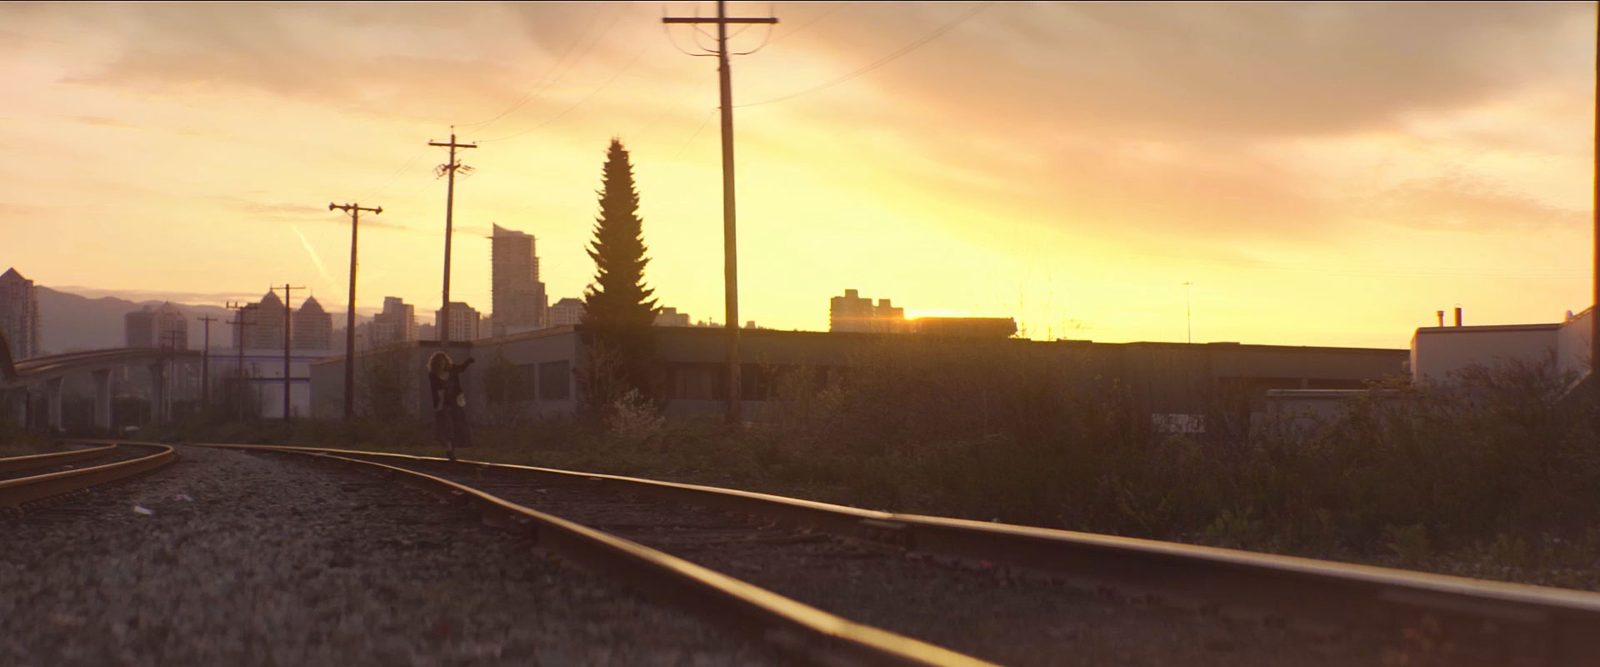
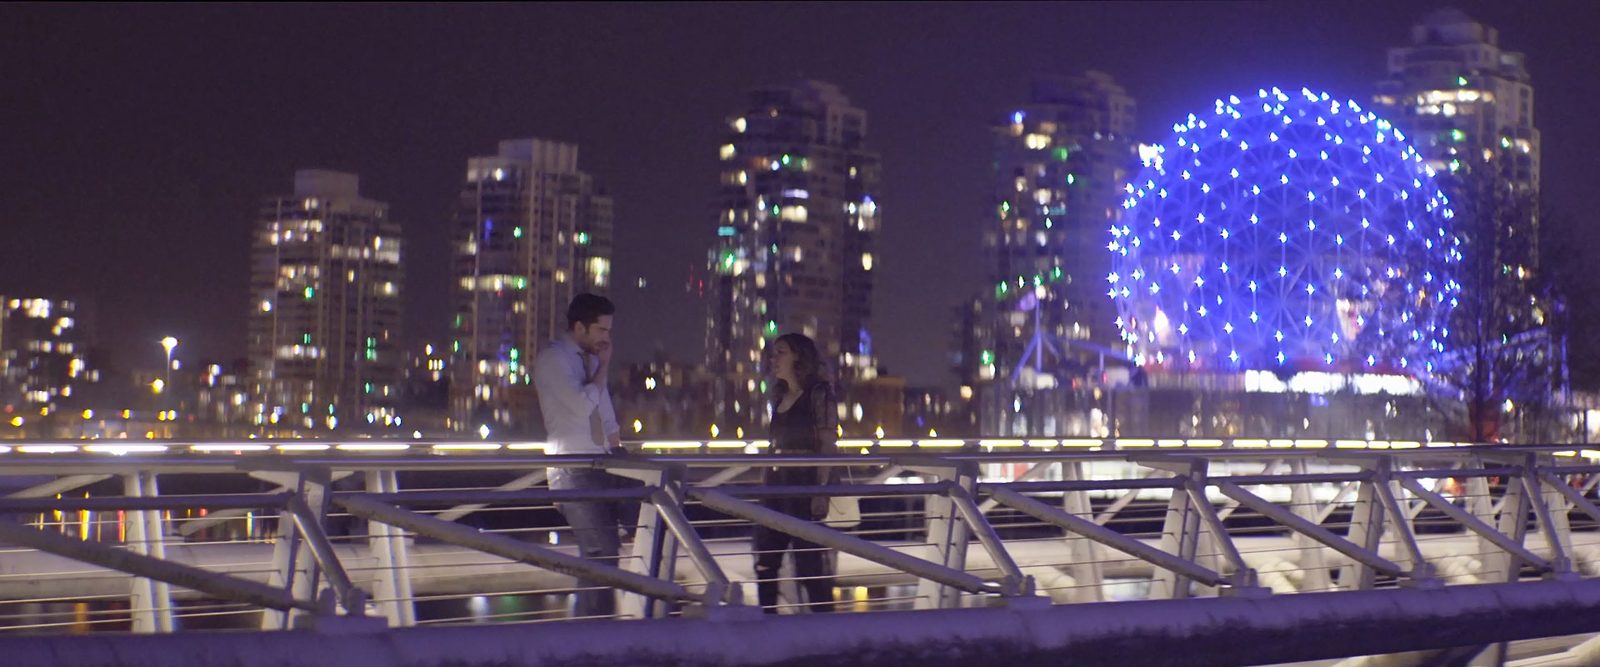
Shooting this teaser was my first experience with the A7s2 and sLog-3. Also my first shoot with SLR Magic's VariND Mk II, and some anamorphics to be the cherry on top. I wanted to keep the shutter speed constant at 1/50 and we had plenty of daylight/exterior shots, including sunset and sunrise. I had the ND on for both of these, and almost at the maximum setting, due to sLog-3's minimum ISO of 1600. On the bright side - pun intended - of having too much light, this allowed me to stop down my taking lenses to f/4 and get reasonable depth of field even in the most extreme shots, such as the exterior night ones, without ANY lighting but the city's.

For stupidity reasons (I forgot the proper step rings at home), I shot most of the teaser on the Jupiter 9 (85mm f/2). Looking at the footage in post, it was waaaay shakier than I remembered on set - I was doing it all handheld, again for stupid reasons, and it weighted quite a bit - and the anamorphic had a misalignment wobble to it. Upon later inspection I learned that my M42-EF adapters are all too lose on the Metabones for the A7s2, but that was too late. In order to solve both the wobbliness and all the camera shake, to get the smooth shots you see in the teaser I resorted to After Effect's Warp Stabilizer. I hadn't used it in forever, and had some troubled memories of previous experiences. It seems they upgraded the tool, since I was able to achieve positive results and not even need to crop in more than 5%. Since we shot it all in 4k and downscaled to 1080p, I believe the extra resolution might've helped with things such as "Synthesize Edges", another thing is that the shots were shaky but they didn't have a lot of motion in them (like pans, tilts and stuff), nor busy backgrounds (lots of tiny moving things like traffic or people).

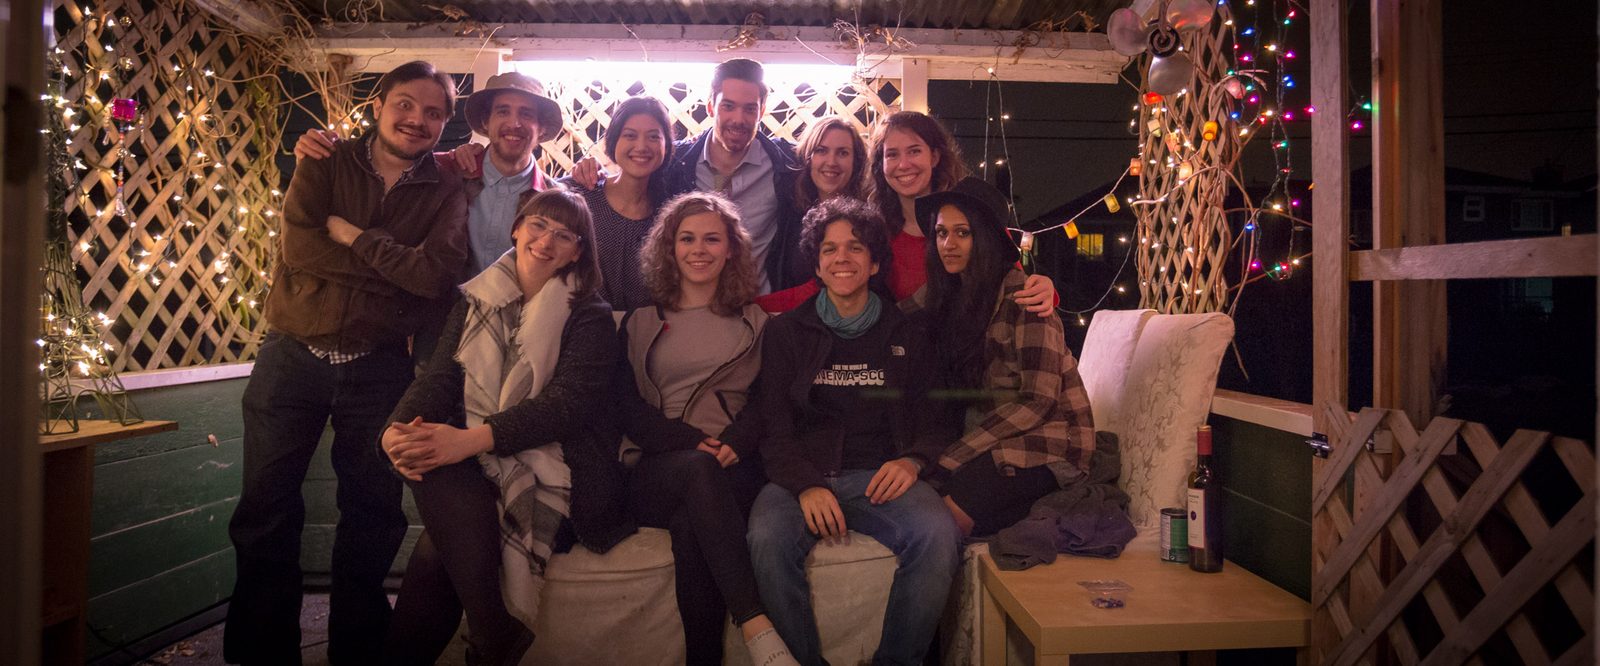
The Rectilux behaved as expected, with sharp results and allowing me to do close focus shots without a hitch. Even though the front rotates - which is a problem for the VariND - all our rack focuses were so subtle that the polarizing effect went unnoticed. I didn't tape the Jupiter 9, so the focus ring kept moving between shots and that got me a little annoyed for I always had to re-check focus for everything. The wide shots of the patio - and the crew - were cheated with Canon's EF 17-40mm f/4. We used the grid lines in the camera to have a good idea of how the final framing would be (2.35:1), and then switched back to the 4:3 grid for, again, a rough idea of the final anamorphic framing.

When I got the two hours of footage down to the maximum duration of one minute it was time for color correction in After Effects. This is when I saw the sLog footage shine and was really impressed by how clean the images were. Some of the shots had ISO 12800 and after a little bit of denoising they were all good and clean! I did the color correction using Magic Bullet's Colorista III and MB Looks, which are easy to play with and give great results. I added a some specific Hue changes here and there too, as well as some glow and sharpening for final touches and voilá!

Day-to-Day

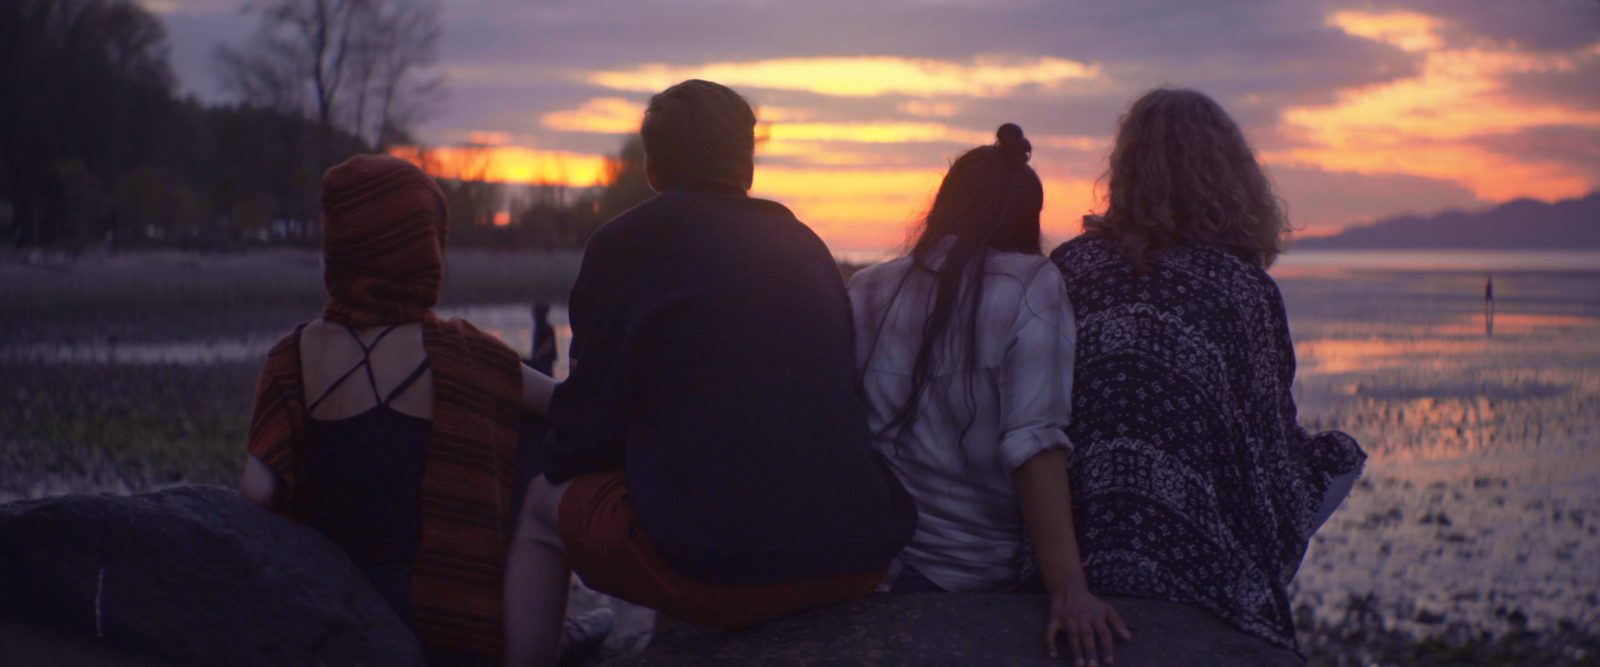
The New Romantics.

April 10, 2016

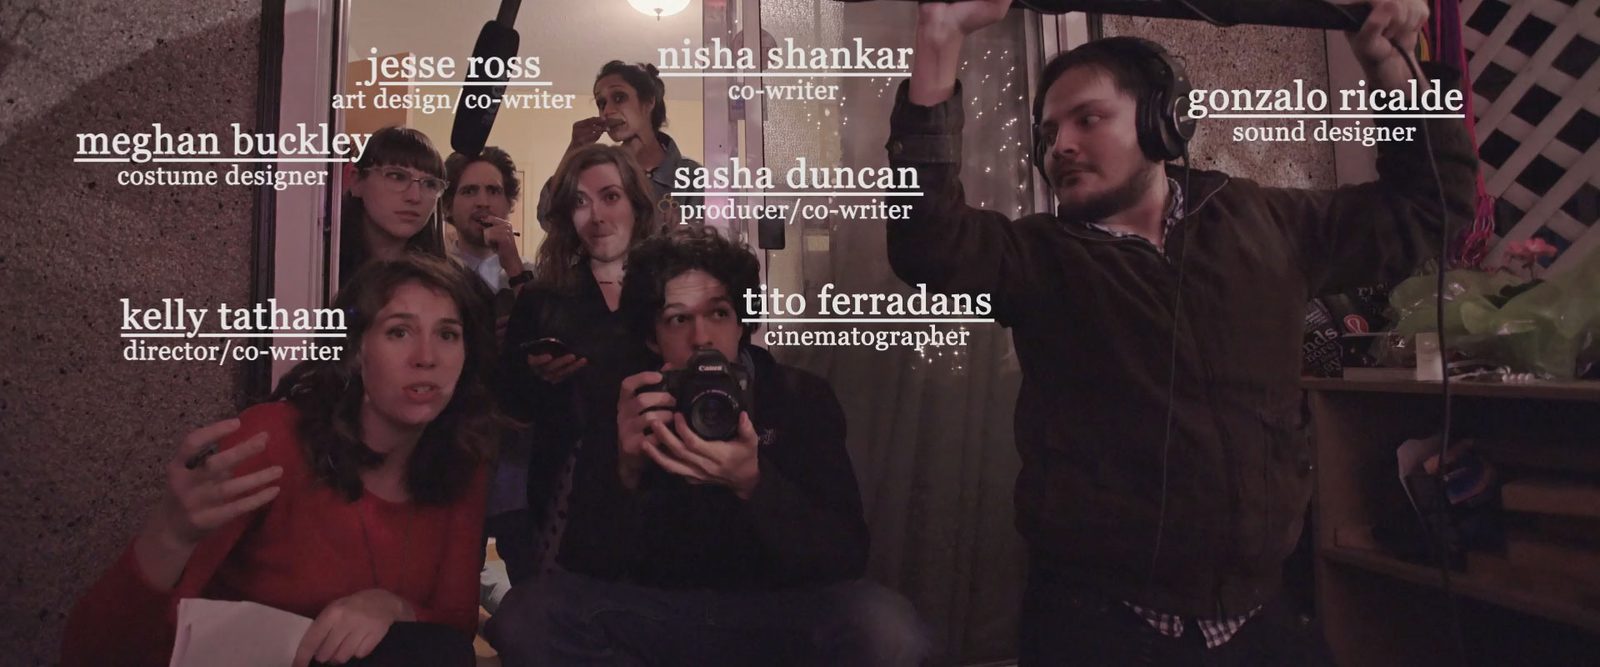
Last weekend was epic. About a month ago, Storyhive announced their webseries competition (is that the right word?) was open, and the deadline is tomorrow. The first stage is to deliver a one-minute pitch video for a show along with a bunch of other documents and concepts, proving that you sort of know what you're doing and that you'll deliver them something. From all the pitches, Storyhive gives a $10k grant for fifteen projects in British Columbia and fifteen more in Alberta. A few days after the contest was announced, Kelly - from my film classes at Langara - invited me to a meeting with the people she was putting together as a team for this. That's how I got to meet Sasha - our producer and co-writer -, Nisha - co-writer and art designer - and Jesse - co-writer and art designer as well. Kelly herself was doubling as co-writer and director. I was coming in as cinematographer and, for the time being, editor. On the same day I brought Gonzalo aboard as our sound person.

Our goal: write, cast and shoot a unique teaser that (as the rest of the team) doubles as pitch video by introducing our characters, the crew and the concept for the show. A show in which Vancouver plays itself and we follow the lives of four young people - Clinton, Wallace, Molly and Jackson. I'm not gonna try to explain it by myself, so I'll just quote the writers (as they're more numerous and experienced than me) with the plotline: "A post-modern comedy following four friends through heartbreaks, hangovers and (happy) endings in No-Fun City". If you're not from Vancouver or didn't get the No-Fun-City reference, here's your chance.

One week after that meeting we had a first version of the script with a bunch of locations all around the city. There was also casting and location scouting (which was the moment when I realized the power of sun surveyor apps, but that's another post). Out of casting the characters came to life through Michela, Brad and Angie... and Nisha (yep, one of the writers!). Shooting was scheduled for the weekend (April 2nd and 3rd). The weather forecast kept messing with us, saying stuff like "cloudy" or "rain" when what we needed the most was clear weather, particularly during the sunset. I was worried to the point that I kept annoying Sasha to switch the scenes from one day to the other because of the sun - and I'm deeply grateful because she did it for our most important scene and the rest worked out perfectly. Meghan, our costume designer, also came aboard during this pre-production time, making the characters look amazing.

It had been the longest time since I'd been on set with a real team - where people do their work and collaborate to improve everyone else's. It was a truly great experience, resulting in some of what I believe to be my best work. Everyone in the team was amazing, fun not only to work with, but to chat during our long breaks (it felt like a 36-hour shoot with two 5 hour naps in between and a few resting moments while driving to and from location). I mean, we got sunset, sunrise, beach, park, downtown, daylight and night scenes, natural and artificial lighting, improv and scripted, indoors and outdoors, it really feels like something that couldn't be shot in a single weekend!

After shooting, I edited our pitch in two days and then spent another half day sitting down with Kelly and refining it to perfection. After that Gonz worked on the sound and I got the time to jump in full-on in post-processing: stabilizing, retiming, compositing and grading. That made a world of difference and it was the moment I was able to clearly see that the A7s II was a real upgrade from the 5D3. Our teaser comes out on the 18th and I'm gonna need all your help with voting and sharing it to make sure we're the most popular project in that competition!

I wanted to enthusiastically thank the people involved, all of you. It was both an honor and a pleasure to work with such dedicated and talented artists. If we win, I know shooting the pilot will be a blast, so bring it on, Storyhive!

Day-to-Day

A Few Notes on the Sony A7s II.

April 7, 2016

Since I bought the camera, I've had lots of people asking me various things about it. For the first couple of weeks, all I managed to do was shoot stills of my cat and roam pointlessly through the menus. Being a Canon user ever since I started photography (aka 2008), switching systems was a bit challenging since buttons change place, menus are divided differently. The whole "going mirrorless" thing was also a drastic change since the camera HAS TO BE ON in order to see anything. On the bright side, powering up is lightning fast (that coming from a MagicLantern adept, used to extra loading times for modules and LiveView), and being able to record video looking through the viewfinder instead of the LCD screen is also a nice feature, since it provides a lot more of stability.

I spent the entire first day just messing around the menus. They go several layers deep and getting the right settings can be tricky. One of my best sources of reliable information regarding these settings was a seminar by Philip Bloom, which is actually for the A7s I, but most of it applies to the A7s II. There a few differences between both models, and I think they are 1600 ISO as the minimum for shooting S-log, instead of 3200. There's also the 5-axis stabilization that wasn't present in the Mk I, and S-log3 in addition to S-log2 - which is even less contrasty.

On the downsides, I still haven't learned to expose stills properly. Most of my raws come out extremely underexposed. The safest way to do so is trust the histogram instead of what you're seeing on the screen (any of the screens). Opposed to that, bringing these very same underexposed raws into Lightroom gives you a hell more wiggle room than Canon ever gave. You can pump up the exposure almost up three stops and still be free of weird noise. Speaking of noise, low-light performance was the key aspect for me to choose this camera. Being able to push the ISO high and don't worry about noise is something I started to get used with the Canon 5D3, pushing ISO 1250 and not worrying too much. On the A7s II, I'm pushing ISO 12800 and getting clear images. Also, the noise cleans up very nicely in post.


Underexposed still brought back to life!

More cool stuff: customizable buttons. LOTS of them. With plenty of functions to assign. I've set mine close enough to my Canon settings but I still struggle with a few settings I have to tweak when shooting (like the previously mentioned stabilization) and other functions I didn't have in the 5D3. Among the functions I didn't have in the 5D3, the A7s II offers Zebras and Focus Peaking right out of the box. The Zebras work flawlessly, but I'm still getting used to the Focus Peaking (it's not as efficient as MagicLantern's).

Now frame rates and crop factor! 4k internal is awesome. I'm not a fan of 4k itself, but for downscaling and stuff like that, it's amazing. The camera also offers an APS-C crop mode, which punches 1.6x into the sensor, for a S35 area recorded to HD resolution. That's pretty awesome since it allows us to use S35 lenses on a full frame camera (and kills the need for a smaller sensor camera as a B-cam). You can also shoot 120fps in 1080p, but that punches a 2.2x crop. For that reason I got a Metabones Speedbooster from EF to E mount, which brings the crop down to APS-C when shooting 120fps.

The image stabilization is pretty awesome, especially for people like me that don't shoot using modern lenses, just vintage glass. It works by moving the sensor according to your hand movement. If the lens has electronic contacts, the camera knows its focal length and everything is fine, but using non-electronic lenses is also supported, you just need to manually set the focal length so the stabilization is done properly.

Shooting S-log is amazing, but it takes a lot of NDs and stopping down the lenses for a correctly exposed shot during daytime. I had SLR Magic's VariND on at the maximum strength while shooting both at sunset and sunrise well after the sun was up and before it was up. The low noise level also helps for stopping down the lenses when shooting at night, fighting off that common issue of razor thin depth of field because the only way to expose the shot is at f/1.2.

A thing that really bothers me is that neither screen is sharp when you hit the magnification button to check focus. On Canon's you undoubtedly know when focus is right, but on Sony there is a lot of back and forth before settling on a focus distance. This issue is countered by the ability of magnifying during recording (something Canon doesn't allow), so I constantly hit it up in the middle of a moving shot, just to be sure focus is right.

The size of the camera is another thing that's drastically different from the 5D3. Much lighter and smaller, it felt a little TOO small for the first few days and my hand started to hurt after using it for a while. Now I'm more used to it, but reaching the buttons sometimes requires finger gymnastics during the shots. Battery life is much shorter than Canon too. The camera comes with 2 batteries already, and I ordered another three right out the bat because they drain very very quickly with constant use. To handle this I kept switching the camera off and on again right before shooting.

One thing that I saw no mention anywhere before experiencing on set is the fact that the camera's screens turn black when you try to record internal 4k while outputting to an external monitor. Everything works fine until you press REC. When you do it the screen turns black and you only get the video feed in the external monitor. If you switch the resolution down to HD, the screens behave normally, but that forced us to jump through a few hoops on set.

I haven't had any issues with the 8-bit log files (they graded wonderfully so far) and the amount of space I'm saving, as opposed to shooting raw on the 5D3, is a blessing. Not to mention the super simple workflow, with no concerns with drop frames, decompressing, debayering, taking forever to render in After Effects, filling cards in a heartbeat, all those obstacles. I had many times when I avoided shooting something on the 5D3 because H264 wouldn't give me enough quality, and shooting raw would be overkill. On the A7s II is quite the opposite: since I know how to expose for video, sometimes I just shoot a few seconds to make sure I'm getting the picture.


That's a framegrab

I am still learning how to expose for stills. Maybe I need to shoot in a Picture Profile that ISN'T S-log, maybe it's just a transition between systems. One thing is certain: even when I expose correctly, Sony's colors in post aren't as pretty as Canon's. And I really miss the ability to stretch the LCD image when shooting anamorphic (farewell, MagicLantern, I'll both miss you and support you forever).

Day-to-Day Anamorphic

Upcoming, 2016.

April 3, 2016

It's a new year and a moment to update my goals and what to expect of the following videos.

USEFUL LINKS:

All the RED links on this post are part of eBay's Partner Network, so if you purchase anything through them, you're helping me to keep this project going.

You can support this project on Patreon. Make your contribution and help the Anamorphic Cookbook!

Good morning/good evening, ladies and gents. Today I'm not here to talk about any specific piece of gear but to hypnotize you with what I've been quietly working on. First off, I'd like to point out this awesome and unique t-shirt I'm wearing, that I designed and printed by myself and that you can order to support the Anamorphic Cookbook, but mainly to look super cool among your spherical-shooting pals. Head on to the store page through this link and the rest is easy, the shirts are $25, shipping included, all through paypal quick and easy!

Now that that's out, you SHOULD have noticed the classy intro sequence for this video, which will be opening all videos from now on. It was a pain to shoot, and an even bigger pain to edit. Not having a macro lens around made it impossible to the point that I had to go and get myself a Pentax 50mm macro. The whole thing was done using Rob's Kinemini 4k camera, shooting at 120 fps and 2k (2.4:1), Kineraw encoded. The camera itself was the easiest part to handle, getting these tiny things in focus was the painful part. Editing half a terabyte of slow-mo footage into 10 pretty seconds was also quite a challenge.

I hope the subjects in this video don't seem totally disconnected, even though they kind of are. If you don't follow my blog, just the youtube channel, you're missing out on the awesome Anamorphic Calculator. After replying to hundreds, THOUSANDS of times to people asking me which taking lens goes with each anamorphic, I took the matter seriously and came up with this multi-function calculator that tells you when you should start to get vignetting according to your camera sensor, taking lens, anamorphic adapter and focal reducer. I think I covered all available options out there, and the custom fields let you input whichever numbers you like, in case you don't find the ones you want. The calculator also tells you the resulting horizontal field of view and the aspect ratio of your final product. You can reverse some of these operations to figure out which taking lens will give you a specific field of view or which crop will get you a desired final aspect ratio.

I am aware there are exceptions and, just as I said in the calculator's post, once you figure out the anamorphic you want you should conduct specific research about it. By "conduct specific research" I don't mean "send me a message". From now on I'll stop replying to blunt messages about gear like "where can I find diopters for my Kowa?" or "does the Rangefinder work with the Cinelux?". I'm also a person, so, maybe start with a "Hi" or "Hello, how are you doing?", including a "please?" somewhere in the message is also a good idea. If you're gonna contact me, first be 100% sure that your answers can't be found in any of my posts. Replying to these messages eats up too much of the time I could be focusing on much more productive research. If you feel lost and abandoned, feel free to let out your doubts and questions on facebook or the EOSHD forum. There are plenty of experienced anamorphic users there (myself included), capable of providing you with answers. If you feel I am the ONLY person capable of resolving your issue, go ahead and send me a message, but be aware I might not reply. The bright side of this is the number of new in-depth posts and the progress on the Anamorphic Cookbook should increase.

Speaking of the Cookbook, this is my second take at an anamorphic guide of sorts. The first one (Anamorphic on a Budget) was a good start, but there are MANY subjects that were left out because I lacked the experience, or simply because I wasn't aware they existed. Now I'm gonna try to cover a lot more ground. The Cookbook is meant to have deeper analyses and conclusions, being useful to any anamorphic enthusiast and even to anyone considering learning more about these lenses. I'm going deeper into the whole diopter party, how taking lenses affect the resulting image, how to fake the look in more effective ways and many other important points (if you wanna check a more detailed overview of my goals, check this link).

This kind of research requires gear I don't currently have, which implies there will be expenses. Because of that, I'll be putting the Anamorphic Cookbook on Kickstarter. You can get yours there, for a lower price than it will be available when it comes out officially. You can also use this chance to get yourself some other useful trinkets such as this amazing shirt, anamorfaked Helios lenses, aperture disks and even skype calls for advice in a particular project. Keep in mind that whatever amount raised there is crucial for the research and tests featured on the book. You are literally helping me to keep going and speeding up the process. If you wanna be notified whenever there's a new post or update regarding the project, send a message to news@anamorphiccookbook.com

Lastly, I'm starting to sell some of my gear. Both of my Isco Wide-Screen 2000s shall go, along with the small Century Optics, Isco-Optic 16:9 Video Attachment and some more. These are all listed in a separate part of my website and the goal is to avoid eBay's taxes and bidding wars. Most of the money coming from these sales is gonna be directed towards the Cookbook, so, besides getting an awesome piece of gear, you're funding more upcoming content. The list is gonna be constantly updated as items come and go, so be sure to check it every once in a while!

Phew, that's it for this video. Subscribe to the channel for getting updates as soon as I upload new episodes and be sure to check all the cool new things mentioned here!

Anamorphic

Anamorphic Chop Shop - Fixing Mumps

March 27, 2016

Use Photoshop's Spherize filter to fix the uneven stretch noticeable in some anamorphic adapters. Also, how to export an image sequence from Premiere, record an action in Photoshop, run it on a batch of images and re-import back into Premiere.

USEFUL LINKS:

All the RED links on this post are part of eBay's Partner Network, so if you purchase anything through them, you're helping me to keep this project going.

You can support this project on Patreon. Make your contribution and help the Anamorphic Cookbook!

Welcome to the last episode in this post-processing chop shop streak. Today I'll explain how to fix anamorphic mumps using Photoshop's Spherize filter.

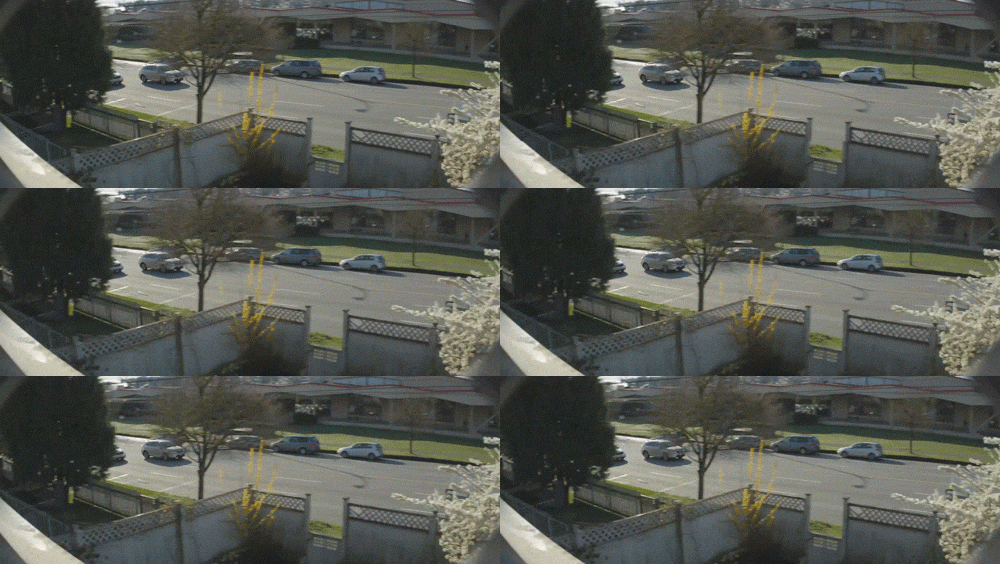
Mumps are that weird looking stretch that you get sometimes, when some parts of the frame look overstretched - mainly the center - and the edges still look compressed. You don't necessarily have both things at the same time, it's usually one or the other. Back in the first days of anamorphic in Hollywood, many actors and actresses included clauses against anamorphic lenses in their contracts for these lenses rendered unflattering images of themselves because of mumps! If you wanna know more about the subject, check Chapter IIIC of the Anamorphic on a Budget. This bizarre effect is due to the cylindrical glass of the anamorphics which isn't even across its width, resulting in an uneven stretch across the frame.

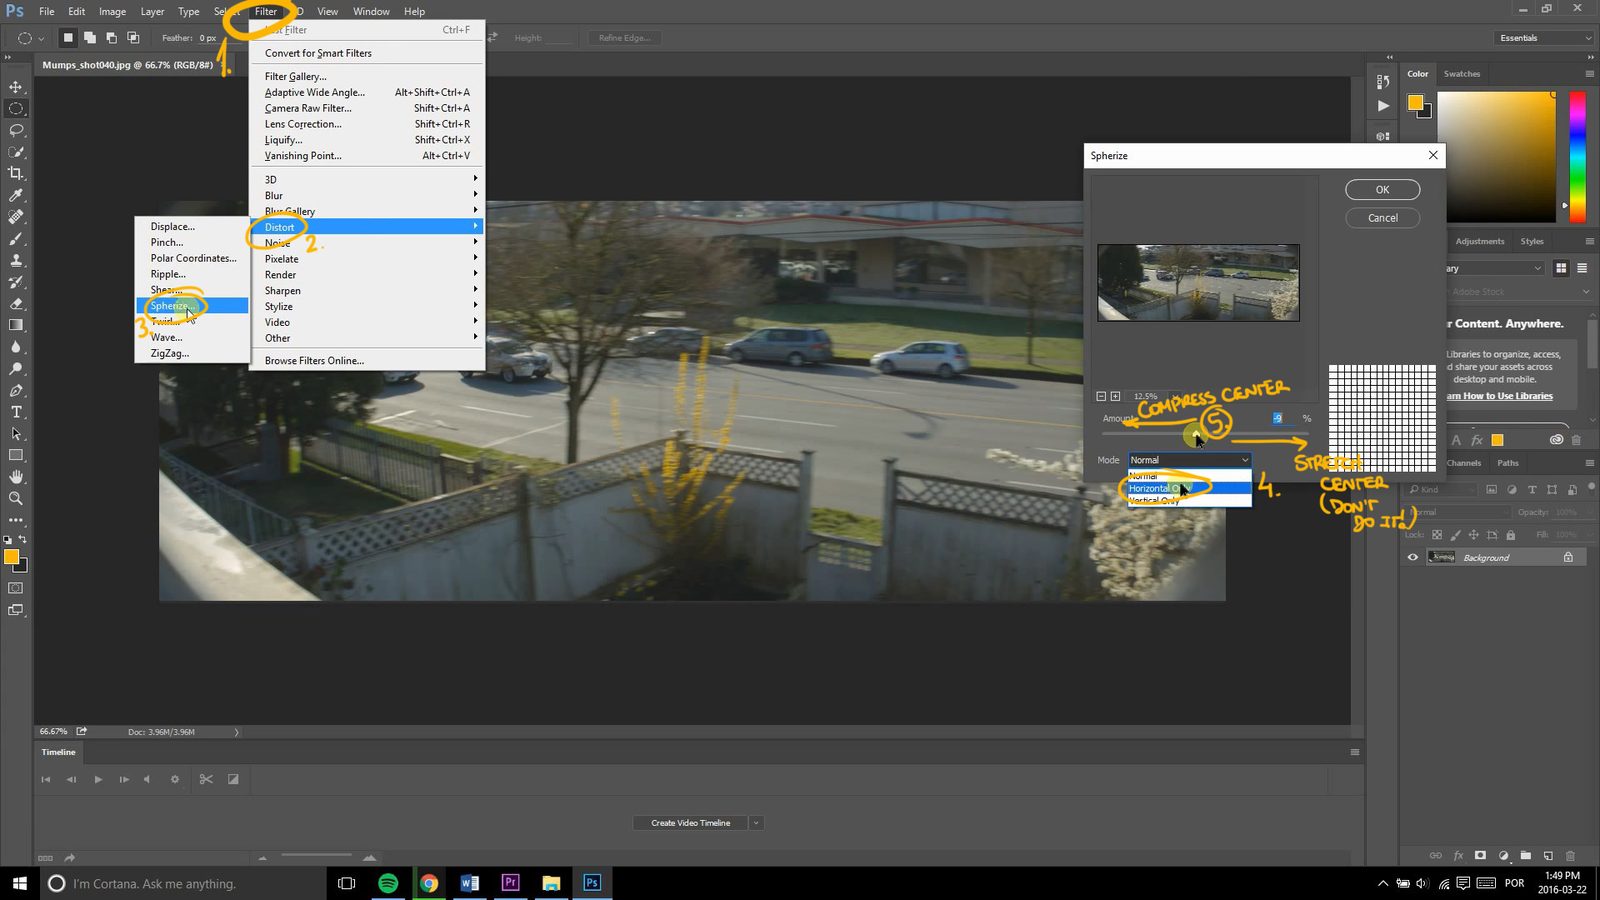
Here's a shot with a case of mumps and here's the same shot, fixed. So let's get to work. Start by firing up Photoshop and bringing in your messed up frame. Now go to "Filters", "Distort", "Spherize".

On Spherize's pop-up window, you can distort things. The default mode will make you worry if this filter is actually any good, but when you change it to Horizontal, you'll see its power. You can go with either positive or negative values. Positive will grow the image from the center, which is the opposite of what we want, and negative numbers will pinch the image towards the center, making the edges more stretched and compressing the center - the most important part here is that it doesn't change the width of the file. This process involves a lot of guessing if you don't have a reference, like a circular object in the center of the frame. The good thing is, even if you guess wrong, it'll still look better than the original! When you're done just press "OK".

Save your fixed frame. Yay! Now repeat the process for the next five hundred frames in this shot! Sounds painful, right?

On the next few minutes I'll explain how to convert a video file into an image sequence using Premiere, then we'll record a Photoshop action, run the action on a batch of images automatically and re-import them back into Premiere.

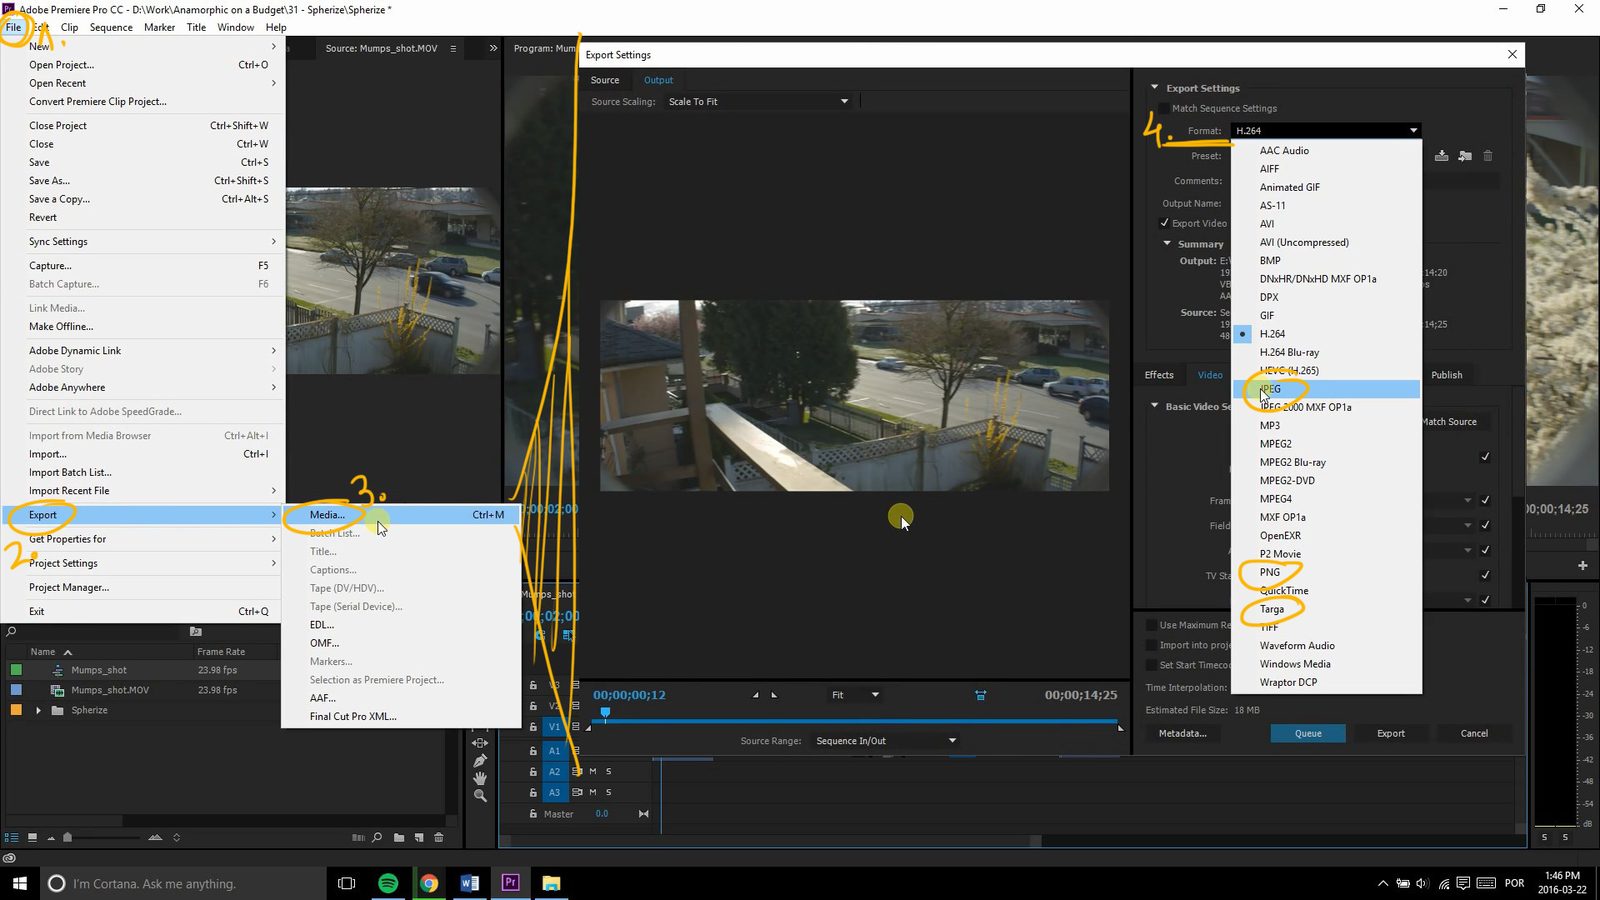
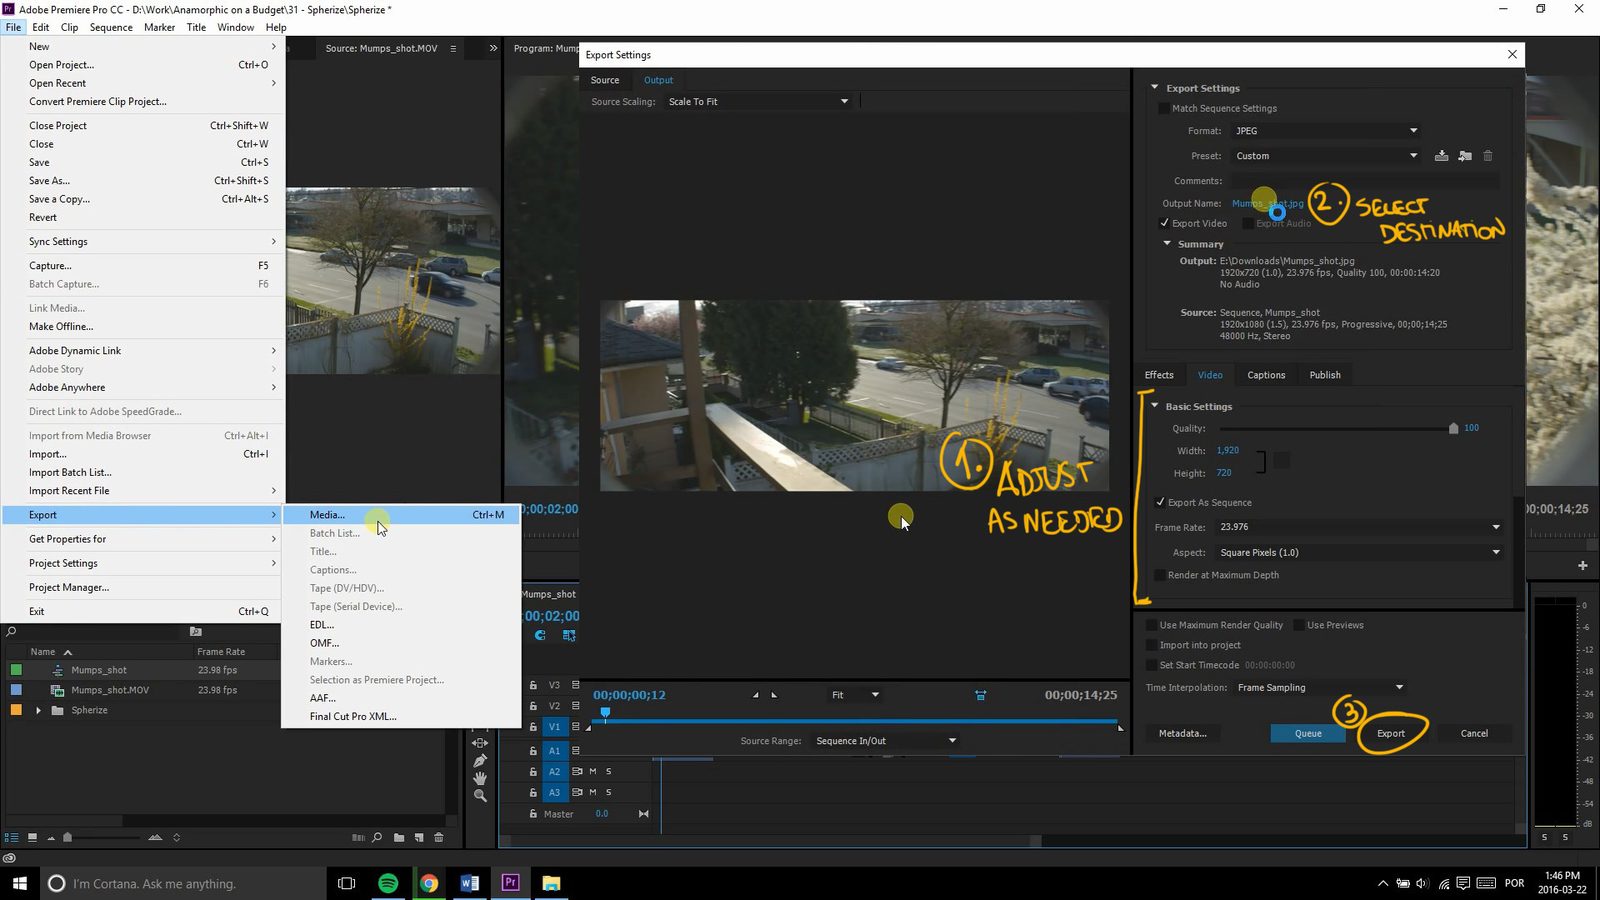
In Premiere, create a New Sequence using your shot and then export it by either going through the menus "File", "Export", "Media" or pressing Ctrl + M. On the Export window we're gonna change the encoding settings to an image sequence. On "Format" you can go with Targa or PNGs for no or little loss of information but rather big files, or just JPEGs for lighter files and heavier compression. Since this video is going to YouTube, I'll go with JPEGs, but if it were 4k for a feature film, I'd choose a lossless format such as Targa.


Choose the destination of the rendered files and hit "Export". Let it process.

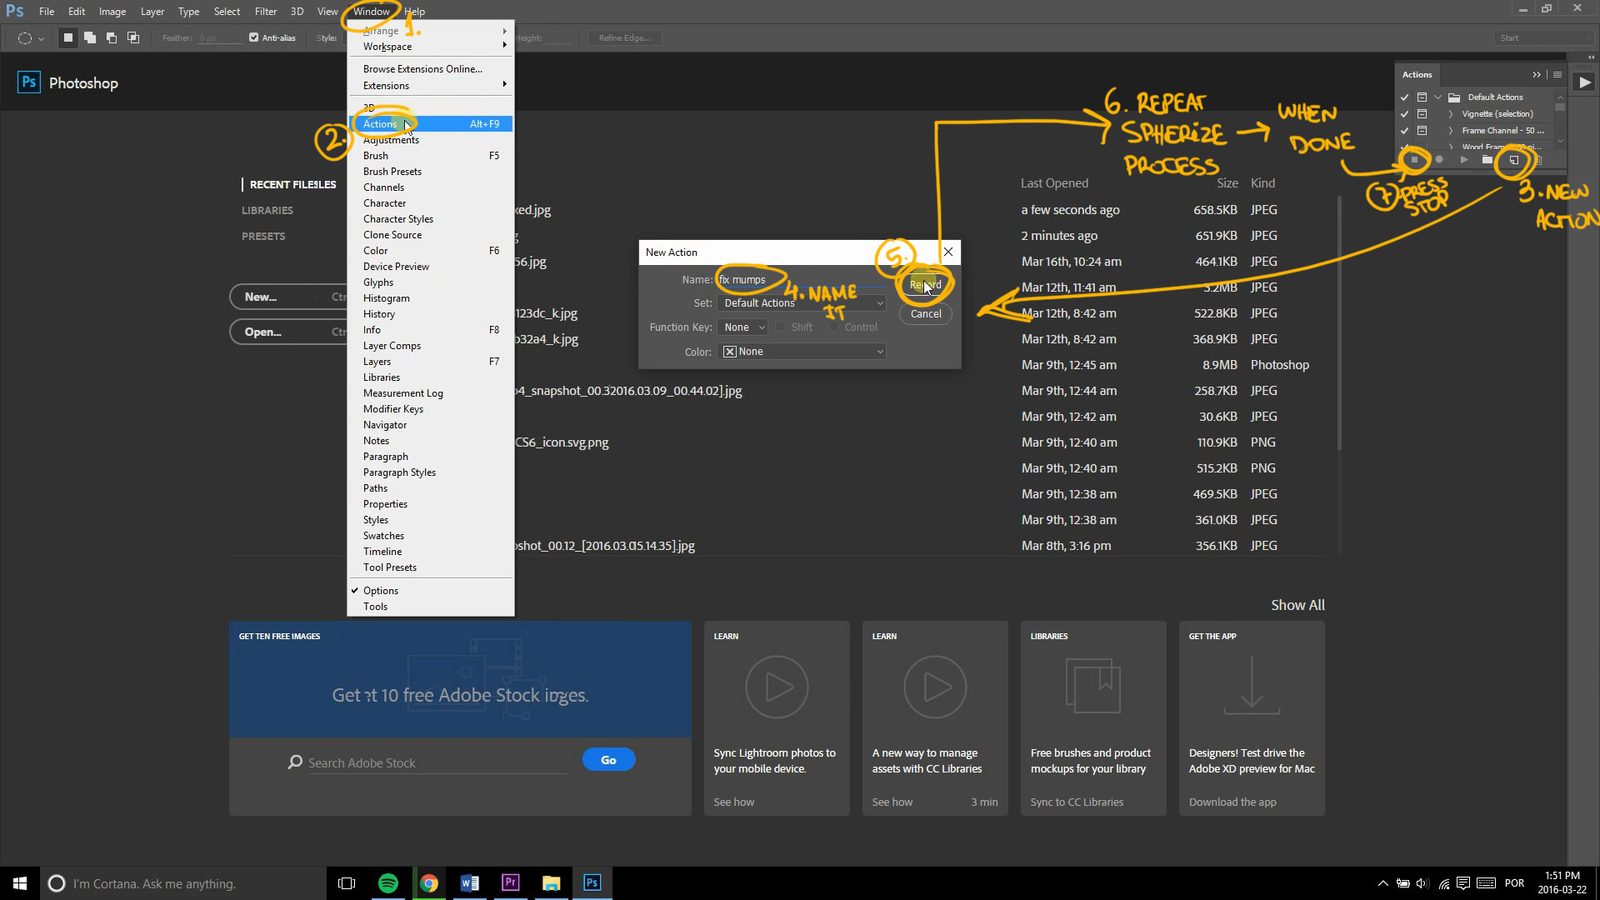
Back in Photoshop, open the Actions menu - "Window", "Actions" -, create a new action - I'll name it "Fix Mumps" - and set it to Record by pressing the small red circle. Now open your first frame, apply the Spherize filter - tweak the settings until it looks right -, save the file in a new folder - mine is the shot name + fixed - and close the image. Hit Stop to finish recording the action.

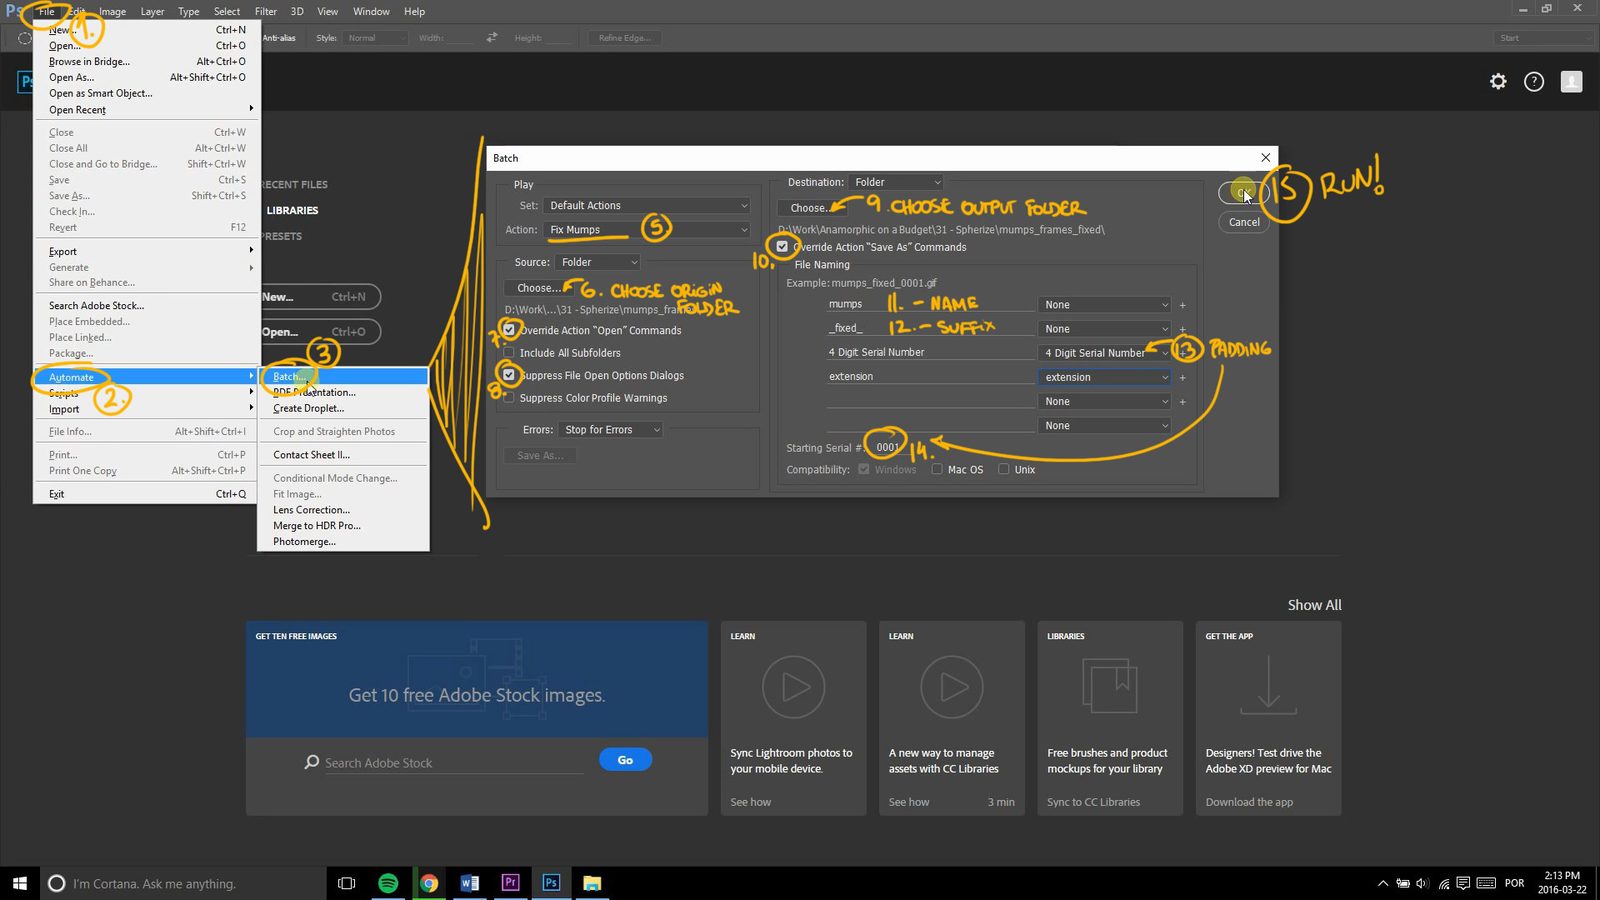
Now on the "File" menu, go down to "Automate" and then "Batch". On the Batch window, select "Fix Mumps" from the "Action" dropdown, leave the "Source" as Folder and click "Choose..." to navigate to the destination you exported your frames. Check the "Override Action 'Open' Commands" and "Suppress File Open Dialogs" so you don't have to click something every time you open an image. Now on the "Destination" side, it's also a Folder, and you get to choose it. I'll use the same folder I just created, with the shot name + fixed. Tick "Override Action 'Save As' Commands". For the file naming section, in the first line, set it to "None", name the shot, second line, just for organization matters, "None" again and I'll add a _fixed_ suffix. Then, on the third line, from the dropdown pick 4 Digit Serial Number, then input your starting serial number down there, in case it starts at a value different than 1. On the fourth line, add the extension.

Click "Ok" and let your computer think for a little while. Photoshop is gonna flicker a little bit while it runs the process on all the frames and saves them to a new destination.

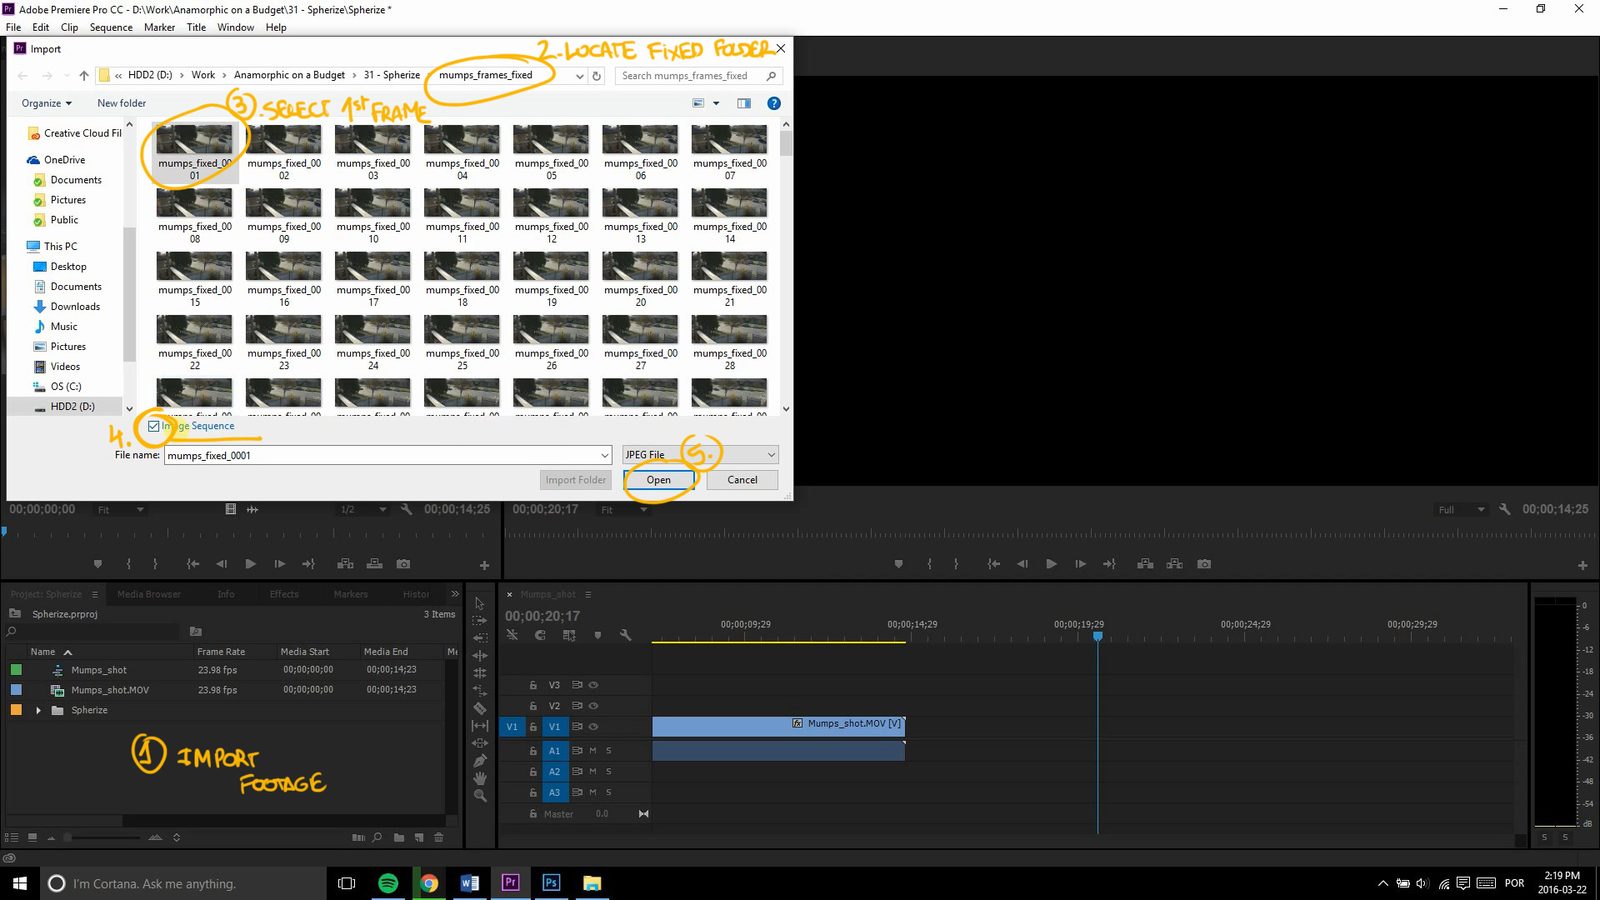
After that's done, we're back on Premiere: in the Import window, go to the folder with the new frames and select the first one, then check the box that says "Image Sequence" and hit "Ok" and that's done! If it has a weird frame rate, right click on it at the Media Bin, go to "Modify", "Interpret Footage" and input your frame rate manually.

Ok, that ran a little longer than I planned for. Again, I hope this is a useful tool now added to your skill set. Subscribe to the channel for new videos and check my blog for all the cool anamorphic content. I'm Tito Ferradans and I'll see you soon! BUY THE SHIRT!

Day-to-Day

Finnegan!

March 22, 2016

I've come to realize I haven't been posting anything about life lately, just anamorphics and and technical things. Time to fix that!

Langara has gotten less worrying than it was in the beginning and we're heading towards the end of the first semester. - I wrote this sentence a week and a half ago and I couldn't have been more wrong. These last few days have been an overload of essays and research and editing at full speed. Anyway, it's the end of my first semester and I'm not taking any classes during the summer. It's time to hunt for work and shoot lots an lots of amazing footage. I'm not yet 100% sure of how I'm going to achieve that, but it will happen.

The end of Winter and start of Spring were incredibly (and unpleasantly) rainy. It rained almost every day. When a day started out sunny and warm, I decided to take the bike outside. At my furthest point away from home, rain would start and soak me to my soul. Even waterproof clothes weren't enough and I had to wash my waterproof shoes (see the contradiction there?) at least two times and dry them on the heating system for a minimum of two times per week. Truly annoying stuff.

On the less annoying side, I replaced the chainring on the bike, making it harder to ride. It actually just made it better, since the original chainring already felt too light for flat stretches of road. I struggle a little more while going uphill, but I'm much faster going down and straight. This is also good because it encourages me to explore different paths, trying as hard as possible to avoid steep hills. It's an unusual way to explore the neighborhood, I admit, but it's very efficient, and riding is so much fun that I don't even bother with the rain while it pours down my face. The post-biking stage is when the complaining starts.

Enough of rain and back to Langara: we're shooting some short films in one of my classes. I didn't expect this at all when I enrolled and I've been having a blast with it. Being on set is an amazing feeling that I had been away for too long. We shoot a short per week, in a 3-hour interval, and every week I realize something I needed and forgot. This led me to buy lots of tape, clothespins, a foldable knife and a decent box-cutter, a voltmeter, zip ties, spare lamps, pins to threads adapters, rope, an extra dimmer and a couple adapters for connecting several lamps to one outlet. Thankfully none of these items costed more than $5. Now I have a box in my closet full of electricity and gaffer stuff, something I promised myself I'd never have back in Brazil (but that I also had, even in greater volume).

Being on set so constantly switched back on my cinematographer side and I've been studying cameras, lenses and stabilizers a lot more recently. I'm putting together all the stuff I need to sell, organizing what I'm selling here and what I'm keeping to sell back home. The goal is to reduce the overall gear count. Later on I'll start planning about optics and start considering upgrading my lens kit (which hasn't changed much over the last few years and it's not that amazing).

I've also been shooting many things for YouTube and bringing up the complexity level, so they take longer to be completely done. This ties into another thing I was observing recently, which is an unhealthy habit of cramming too many challenges at the same time into one single project and having nightmares both in pre and post-production because I'm still learning how to sort out either the files created in the process or a different software package I decided to experiment with, or something weirder. Realizing this has allowed to drop some of the major issues that came up due to unnecessary experiments. It's a moment of clarity that happens in which I think "which one of these two clashing things is more important for this project? Is it the lighting or a shady camera setting? Is it the new software and processing or the camera and resolution?

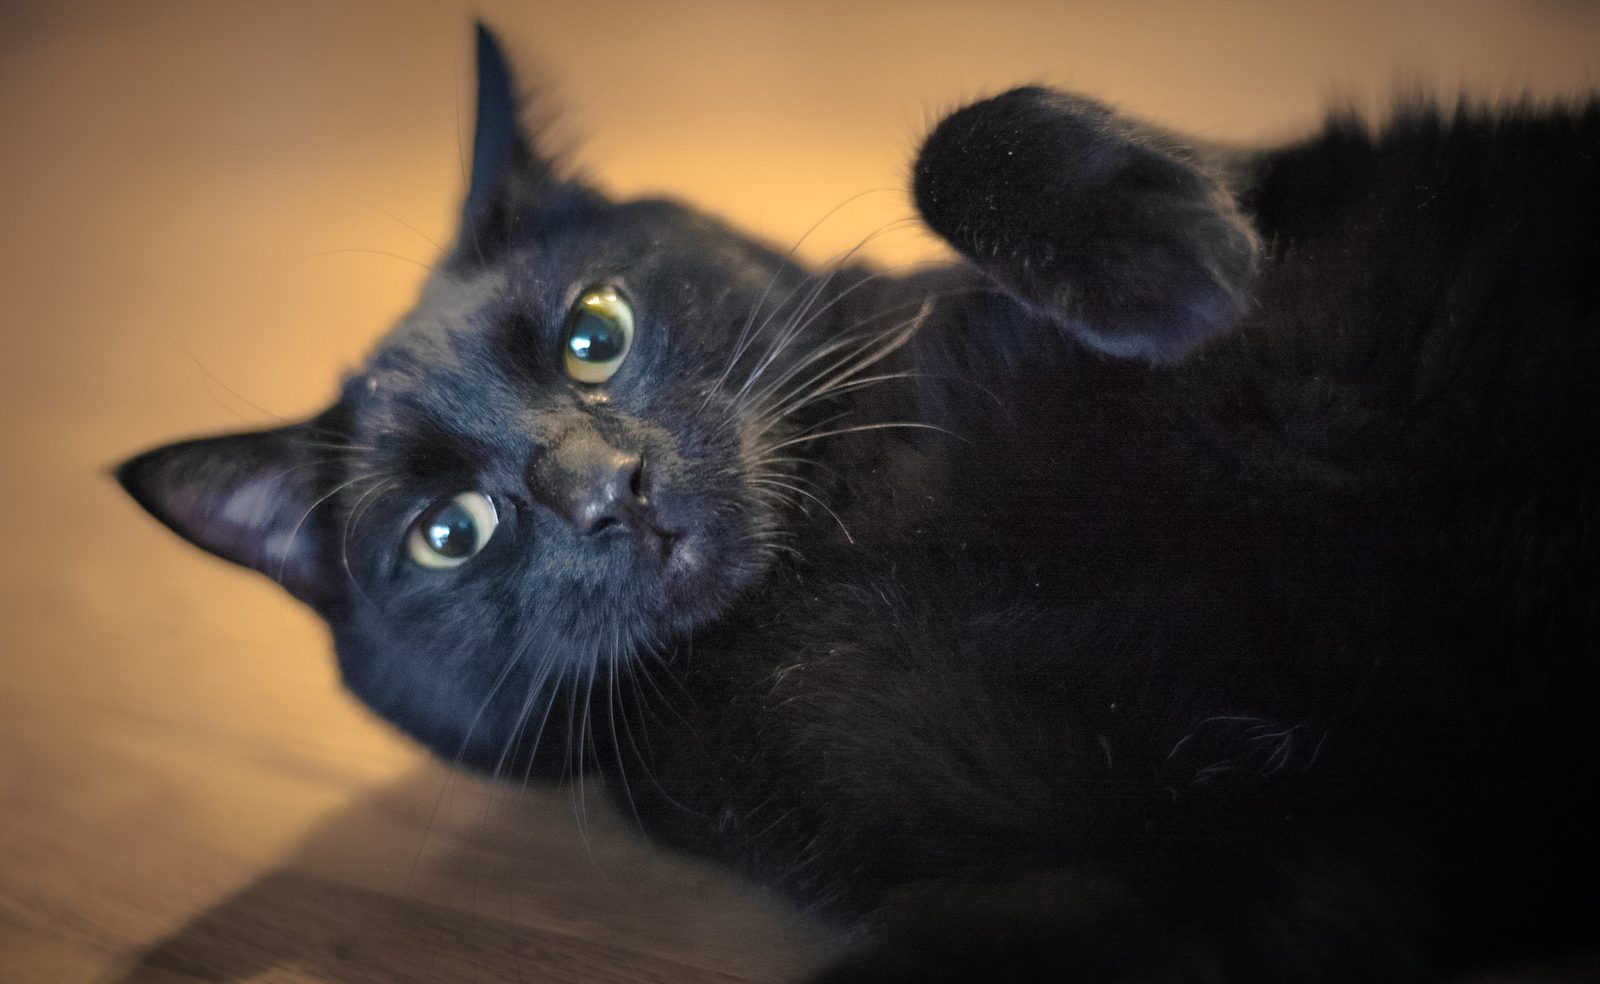
ALSO, we got a cat! His name is Finnegan and his the cutest, sweetest and craziest cat ever. At first he was scared of everything and everyone, but now he's quite familiar with us and the house. I think he'll start appearing in some of my test videos soon enough so you get to meet him in motion, not just in pictures like this one.

It was weird writing this post. Deal with it.